Uncategorized
The Return
It’s been over 3 years since I wrote on this blog although I have not given up on my culinary adventures. I’ve had latent thoughts about returning but with many life changes I was never able to come back and pick up where I had left off. I want to continue but with a few changes in mind. Namely not limiting this blog to merely recipes but restaurant reviews, food and health information that I have found to be interesting, foods that I have tried, and anything food related. Look forward to being back and interacting with everyone!
Thoughts
Sigh. I’m surprised that it is well past summer and fall has emerged. Summer was a long, busy summer which I longed for it to end and continue equally. I feel like summer left with me with memories of a whole year and now I’ve begun 2011. Many things changed. I grew as a person as I learned, read, and thought. I’m in a place that I never expected to be but then again I never had much planned out past the age of 20. Everything is like a new pair of shoes, trying to wear them in so that they’re more comfortable, making sure it’s worth the price.
With that said, I’m not sure I will be continuing this blog. I need to keep up with my recipes no doubt. I still have a passion for food but maybe I might take a different turn on this blog or add to it. I haven’t decided yet. It’s something that I’m going to leave open and hope that I’ll find my way back here soon.
Puffs
During the Islamic month of Ramadan, it has been family tradition to prep food for the month of fasting beforehand so we have more time to spend worshiping. We usually make and freeze three different appetizers so all we have to do is cook them when we want them. One of the three that we make is called Patties which is puff pastry stuffed with ground meat. We usually use ground beef but sometimes we’ll use ground chicken as well.
It’s one of my favorites and we make them throughout the year as well to have as a light snacks or if we have an unexpected guests visit. The filling is quite easy to make but it takes sometime filling all the puff pastries. It helps to have a helping hand.
Ground Beef Patties
2 lbs of ground beef
2 tsp salt
1 tsp red pepper
1 tsp ground cumin
1 tsp ground coriander
1 tsp minced ginger
1 tsp minced garlic
1/3 c petite frozen peas
2 Serrano peppers, thinly sliced
4 hot peppers, thinly sliced
handful of mint, chopped
1/2 cup of cilantro, chopped
1 onion, finely chopped
5 stalks of green onions, finely sliced
packages of puff pastry
1-2 egg yolks
Take out puff pastry from freezer and set on counter to defrost. Wash the meat in a colander. Make sure you squeeze out the water before adding it to a pot. Cook the meat on medium heat with adding in the salt, red pepper, cumin, coriander, garlic, ginger, peas, Serrano & hot peppers.
Water will leach out of the meat and cook the meat. Once the water has dried up and meat is no longer pink, take off of heat. Stir in the mint and cilantro. Let the meat mixture cool down until room temperature. Once its cooled down, stir in the onion and green onions.
Preheat oven to 350 F. The puff pastry should be defrosted by now. It shouldn’t be too hard or too soft. If your puff pastry hasn’t already been cut into squares, cut the sheet into equal squares.
Take one end of the square and fold it to the diagonal corner. Crimp one side so it’s a triangle, closed on one side. Fill the pastry with the meat mixture till its nearly full. Close the open side by crimping the edges. Repeat until meat mixture has run out.
At this point you can either choose to freeze the patties in the freezer in Ziploc bags or bake them. If you’re going to bake them, line the oven with a sheet of foil paper. Place the patties on the foil. Whisk an egg yolk and brush the tops of the patties with the egg yolk with a pastry brush. Bake the patties for until the tops of the patties have turned red. Cool down and enjoy with ketchup or a chutney of your choice.
Scrambled Eggs with Twist
I grew up eating Pakistani food that my mother would cook quite often but she would also make us “American” for lunches and such. I didn’t realize how much I like American food when I went overseas to Pakistan and would have Pakistani food night and day. I would have the biggest cravings for a burger or for a simple sandwich, just anything that tasted American.
I don’t think I’ve ever been denied Pakistani food so I haven’t had a chance to miss it. I do love certain dishes and the best weekend mornings are when my mum makes Undai Payaaz ka Salan (Scrambled Eggs & Onion) with homemade flatbread. I love the warm bread with the soft eggs and onion melting into your mouth.
I was craving some in the past weekend and learned how to make it from my mum. If your tired of plain ol’ scrambeled eggs, definitely try this recipe out. Its quite simple and has a lot of flavour.
Undai Payaaz ka Salan (Scrambled Eggs & Onion)
1 large onion, sliced
a pinch of whole cumin
1 1/2 tsp salt, divided
3 small green peppers
7-8 eggs
handful of chopped cilantro
2 stalks green onions, sliced
pinch of allspice
1 tsp ground cumin
1 tsp groud coriander
3/4 tsp red pepper
1/4 tsp turmeric
1/2 tsp crushed red pepper
1/2 tsp black pepper
2tbs water
In a non-stick skillet, heat up some oil on medium heat. Sautee onions with the whole cumin. Add in 1/2 tsp salt and green peppers. In a large bowl, whisk together eggs, cilantro, and green onions. In a small bowl, combine allspice, 1 tsp salt, ground cumin & coriander, red pepper, turmeric, crushed red pepper, black pepper and 2 tbs water.
Once onions are slightly brown, add in the spices mixture. Mix well and stir in the egg mixture, stirring in circles till the egg mixture scrambles. Take off heat and serve with homemade flat bread.
What type of food can you not live without?
Brunch
I had a brunch to go to a week ago which I was really looking foward to. It was an AMAZING brunch and I had my first Lox sandwich there which I totally fell in love with.
I decided to make some brunch-y desserts to bring along. I had been wanting to make scones and my dad had brought dried cranberries from Turkey so I thought they would be put to good use in the scones. I’m sad I forgot to put orange zest in them because that would have been perfect! But otherwise they turned out pretty awesome.
Scones (from allrecipes.com)
2 cups all-purpose flour
1/3 cup sugar
1 teaspoon baking powder
1/4 teaspoon baking soda
1/2 teaspoon salt
8 tablespoons unsalted butter, frozen
1/2 cup dried cranberries (or dried currants)
1/2 cup sour cream
1 large egg
Preheat the oven to 400 F. In a large bowl combine the sugar, flour, salt, baking soda and powder. Grate the butter using the larger holes into the flour mixture. Using your hands, work the butter into the flour which should resemble a coarse meal. Stir in cranberries.
In a small bowl, whisk together the egg and sour cream. Stir it into the flour mixture with a fork until large clumps of dough form. Using your hands work the mixture together so it turns into a ball. Dust a clean surface with flour and roll dough to a 7-8 in circle, 3/4 in thick. Cut into 8 equal triangles and place onto cookie sheet.
Bake for about 15-17 min until lightly golden. Let it cool for about 5 min and serve with tea.
~~~~~~~~~~~~~~~~~~~~~~~~~~~~~~~~~~~~~~~~~~~~~~~~~~~~~~~
I had just recently watched Ina Garten make a coffee cake and I came across a Rhubabr Coffee Cake which I just had to try since I’ve never had rhubarb before. It’s a little late in the season for rhubarb but the cake turned out well. I added in strawberries to balance out the tartness of the rhubarb.
Strawberry-Rhubarb Coffee Cake (adapted from here)
Cake
1/2 cup unsalted butter, softened
1 cup sugar
2 eggs
1 teaspoon vanilla
1 cup sour cream
2 cups flour
1.5 teaspoons baking powder
1 teaspoon baking soda
1/4 teaspoon salt
In a large bowl, cream together the butter, applesauce, and sugar. Stir in sour cream. In another bowl combine dry ingredients. Mix into the wet ingredients until combined.
Crunch Topping
1/4 cup brown sugar
1 tablespoon flour
1 teaspoon cinnamon
1/2 cup walnut pieces
1 tablespoon unsalted butter, melted
In a bowl, combine all ingredients until evenly moistened.
Fruit Topping
1 cup diced Rhubarb
1 cup sliced/diced strawberries
2 tbs brown sugar
Mix everything in a bowl until combined.
Assembling
Preheat oven to 350 F. Spoon half the cake batter in a greased springform pan. Smooth so it’s an even layer. Sprinkle half of the crunch topping over the batter. Carefully spread evenly the remaining cake batter.
Mix together the fruit and crunch topping together. Evenly sprinkle over the cake batter. Bake in oven for about 55-60 min until inserted toothpick comes out clean. Cool before serving.
Fruit?
I had never been a fan of fruits in salads or food that isn’t dessert-like. I didn’t understand why people did such a thing until I tried my friends CPK inspired Waldorf Salad and I was converted. Who would have thought that apples, chicken, grapes, cheese, salad, walnuts played so well together. It’s my favorite salad to date (even though CPKs Waldorf Salad is one of the most unhealthiest salads). Since then, I’m more open to fruit being in random dishes.
I had a ton of spinach leftover and with the constant stream of summer strawberries in my fridge, I just had to make this Strawberry Spinach Salad I came across. Strawberries are quite amazing berries. Not only are they wonderful in all the normal strawberry ways, they are amazing to make salsa with (sounds odd, yes I know but a must try!), and in salads.
Strawberry Spinach Salad (from here)
4c baby spinach
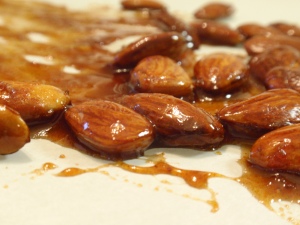
1/3-1/2c candied or toasted nuts (I did almonds, but walnuts, pine nuts, or pecans can be options)
1-1 1/2c strawberries, diced
Tangy Poppyseed Dressing
1/3c sugar
3/4 tsp salt
1 tsp dry mustard powder
1 Tbsp poppy seeds
1/3c red wine vinegar
1/4c canola oil
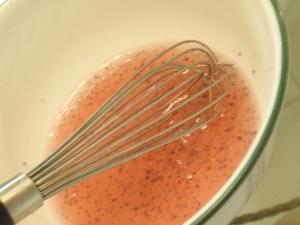
Toss the spinach, strawberries, and nuts in a large bowl. In a small bowl, combine sugar, salt, mustard powder, poppyseed. With a whisk, pour in the vinegar. Slowly whisk in the oil. Drizzle dressing as desired on salad.
I took this bloggers advice as featuring this salad as a main dish with having sides of grilled corn, vegetables skewers, chicken, and roasted potatoes. It was an amazing dinner that was quick and easy to throw together that everyone in the house helped throw together.
One of my friends just got back from touring Spain and was kind enough to bring back a cookbook for me.
Can’t wait to try out the recipe. Thanks Egg!
Today I will be make a Rhubarb-Strawberry Coffee Cake and hopefully Scones to bring to a brunch tomorrow. I’m really excited to finally try rhubarb!
Summer Fun
To kickoff summer and intense heat, I hosted a pool party at my place. I would have rather done it later in the summer but most of the summer is piled up with things to do and places to be.
This is what the menu was:
Homemade Hummus
Sliders
Swiss Roll
Caramel Apples
I can’t begin to describe how great hummus is and if you haven’t tried some, you’re severely missing out! You can buy store bought hummus, but making it at home is fairly easy. The following recipe is a little bit more work and was a little bit too garlic-ky. I lovvvee garlic so if you like a milder garlic taste, I’d reduce the amount of garlic.
Hummus (from here)
2 heads garlic, intact
2 tbsp. olive oil
2 cloves garlic, peeled and sliced
3 tbsp. freshly squeezed lemon juice
¼ cup water
6 tbsp. tahini
1 (14 oz.) can chickpeas, drained and rinsed (I used fresh chickpeas)
1 clove garlic, minced
½ tsp. salt
Pinch of cayenne pepper
1 tbsp. fresh parsley, minced
If you’re using fresh chickpeas, soak them overnight in water. The next day boil them in the water till they are soft.
Preheat the oven to 350F. Chop off the quarter half of the garlic heads and wrap in foil with a pad of butter on each head. Bake for about an hour. Meanwhile in a small skillet, heat up the olive oil in a small skillet and cook the sliced garlic till they brown. Using a slotted spoon, remove the garlic pieces and place on a paper towel to drain. Now mix the oil with the tahini sauce in a small bowl.
In another small bowl, combine lemon juice and water. Remove the garlic heads from the oven once they’re done and squeeze out the garlic. The garlic should be soft enough to push through the skins. Discard the garlic skins. In a food processor, process the chickpeas, roasted garlic, clove of garlic, salt, and cayenne pepper. Occasionally scrape down the sides of the bowel to make sure everything is incorporated. With the machine running, add the lemon-water through the feed tube following with the tahini-oil mixture. Process everything till smooth. Empty out into a flat serving bowl and garnish with parsley, the browned garlic pieces, and olive oil.
~~~~~~~~~~~~~~~~~~~~~~~~~~~~~~~~~~~~~~~~~~~~~~~~~~~~~
I was given the idea of making sliders from A Lil Nibble and it was a great idea indeed. I was worried about not being able to find mini buns but after some searching online, I found most people used dinner rolls. It’s not perfect but it got the job done. I used fresh baked dinner rolls from the local bakery and they went with the sliders.
Sliders
4 1/2 lbs ground beef (don’t get lean meat)
1/2 cup panko bread crumbs
3 1/2 tsp salt
1/2 cup parsley
1/2 onion
1 tsp garlic powder
1 tsp onion powder
1 tsp black pepper
1 1/2 tsp Burger Spice by Chefrite
1 1/2 tsp Worcestershire Sauce
In a large strainer, lightly wash the ground beef. Make sure you squeeze out all the water properly. In a small food processor, combine the parsley and onion. Pulse till the parsley and onion are finely chopped. In a large bowl, combine all ingredients, making sure everything distributed properly.
Taking about 1 1/2 tbs of meat, make small patties. Line a baking tray with parchment paper and place your patties on the tray. Once the tray is filled, you can add another layer of parchment paper on top and add more patties. I had about 37 patties made from 4 1/2 lbs of meat.
On the grill or a countertop griddle, cook your patties on medium heat till its cooked through and each side is dark brown, about 4 min on each side. Heat your buns in the oven for a few minutes so they’re slightly toasted.
Assemble burgers with desired condiments. I used baby spinach as my “lettuce”, sliced my own cheese, and has basic condiments such as mayonnaise, ketchup, and mustard.
~~~~~~~~~~~~~~~~~~~~~~~~~~~~~~~~~~~~~~~~~~~~~~~~~~~~~
Little Debbie snacks were much coveted when I was younger. I remember eating Zebra Cakes, Fudge Brownies, Strawberry Shortcake Rolls, Devil Squares, Cream Pies, Star Crunch, Fudge Rounds, and Swiss Rolls, the whole lot of them. I haven’t had them in a realllly long time so I can’t compare the swiss roll that I made with Little Debbie but the ones that I made, were so light and not too sweet at all. It was almost like I was eating pound cake with a yummy filling. It’s like having an awesome piece of cake without having to feel too guilty about it.
The original recipe covered it in chocolate which I opted to skip out but maybe next time I will indulge.
Swiss Rolls (from here)
5 eggs, seperated into yolks and whites
1/2 cup of sugar divided + 2 tbs
1/2 cup of cake flour
1 tsp vanilla extract, divided
1/2 tsp salt + a pinch
4 tbs butter, melted
1/2 cup whipping cream
Your favorite Jam
Preheat oven to 350F. In a large bowl, whip together your egg yolks, 1/4 cup sugar and 1/2 tsp of vanilla for about 3 min, till the eggs looks pale yellow. Fold in the cake flour. In another bowl, whip together the egg whites with 1/2 tsp of salt until soft peaks form. Add in 1/4 cup sugar and beat still you have stiff glossy peaks.
Fold the whites into the yolk mixture till there are no streaks. Quickly fold in the melted butter. Butter a large baking tray and line it with parchment paper, then butter the paper. Spread the cake batter evenly onto the tray and bake in oven for about 15-20 min until golden and puffy.
While the bake is baking, in a bowl whip together 1/2 cup of whipping cream, 2 tbs sugar, and 1/2 tsp of vanilla extract till it form stiff peaks.
Invert the cake on a large cutting board after it has cooled. Spread your favorite jam evenly all over the cake. Spread the whipped cream evenly over the jam, trying not to mix the two.
Roll the cake carefully from the longside of the cake until you have reached the end of the cake. Scrape off any excess cream/jam that might have oozed out. Cover the cake with plastic wrap and place in fridge for 6 hrs or overnight. Once it has chilled, unwrap the cake and slice up the cake to serve.
~~~~~~~~~~~~~~~~~~~~~~~~~~~~~~~~~~~~~~~~~~~~~~~~~~~~~~~~~
I’ve been wanting to make caramels for quite a while but most of the recipes call for HFCS which I’m pretty much against. I did find a document of really old recipes which I might try out. However, for the party I made a caramel sauce to pour over apples which was a sinch!
Caramel Sauce
1 1/2 cups of sugar
1/3 cup of water
1 1/4 cup whipping cream
1/2 tsp vanilla extract
In a sauce pan, add in the sugar. Pour the water onto the sugar with out mixing. You don’t want to move the sugar around or it’ll crystallize and you’ll have grainy caramel. Turn onto medium heat and let it cook without stirring. While the sugar and water are cooking, make sure you have your cream ready to use and whisk on hand.
Once the sugar has turned amber, pour in the cream which might splatter a little bit. Start mixing the mixture with a whisk until the sugar uniformly combines with the cream. Turn off heat. Serve warm or room temperature.
Summertime Berries
Although I loathe the extreme heat in the summer, I can’t complain when berries come to bloom during this sweltering weather. There’s an abudance of ways to eat/prepare berries, which is one of their beauties.
Growing up, I ate Fruit-Rollups and Fruit By the Foot in abudance but I never knew that they don’t actually have any fruit in them; just HFCS and an array of food colorings. I realllllly wanted to buy some recently while grocery shopping as I have a thing for nostalgic things, but I resisted! I came home and made some fruit leather/rollups that are 99% all fruit. It’s an easy snack that can be used if you have an excess of berries.
Strawberry Fruit Leather (from here)
4 pounds of fresh strawberries, cleaned and stemmed (or any fruit you would like)
1/2 – 1 cup of sugar (depending on the sweetness of the fruit)
juice from 1 lemon
Combine everything in a pot and with an immersion blender, blend everything till smooth. Place on the stove and bring to boil, constantly stirring. Skim off the foam that forms on top. Reduce heat and simmer for 30-45 min until the mixture thickens. Preheat oven to 175 F. Line a baking sheet with parchment paper. Spread the berry mixture on the parchment paper evenly and bake it for 8-10 hours, till the center isn’t sticky.
Let it cool before rolling the parchment paper and slicing the fruit leather to make rolls.
I had a banquest to go to last week and I was in charge of appetizers. I made a Watermelon Basket, Egg Salad Sandwiches, and a Cream Cheese platter with Habanero Mango Sauce.
Watermelon Baskets aren’t too hard to do, you just need to measure it out properly and have a carving untensil. You measure where the midsection of the melon is lengthwise and measure out a thick band ontop of the watermelon for the handel. Using your carving untesil, you just trace out the pattern you’ve measured out and carefully pull out the pieces that are needed to be removed. Scoop out the fruit with a ice cream scoop or melon baller.
The Egg Salad sandwhiches followed my deviled egg recipe with the additon of some chopped celery and a squeeze of honey mustard. Instead of seperating the egg yolks from the whites, I gave the boiled eggs a rough chop and mixed everything together.
The Cream Cheese platter was pretty simple. I sliced cream cheese through the middle so theres a top and bottom and laid them out side by side. I bought a Habanero Mango Sauce but any sweet-spicy sauce will work and poured it ontop of the cream cheese. Surround by water crackers.
Fear of the Unknown
It always takes an extra effort to breakaway from routine things to go and try something new. It makes sense because what we know is what is comfortable and easy. The fear of the unknown often deters people from engaging in new experiences. Sometimes being brave can prove disastrous results, but it can also bring about amazing discoveries such as the barley lentil soup I came across.
I’ve never cooked barley before so I really didn’t know what to expect. I’ve been wanting to incorporate more whole grains into my diet so I gave it a try and I’m sooo glad I did. Its a soup that has a chewy bite to it, great flavors, and takes very little effort putting it together. I hope you like it as much as I do.
Red Lentil & Barley Soup (adapted from here)
2 teaspoons olive oil
1/2 onion, diced
4 scallions, diced, whites and greens divided (optional)
1 clove garlic, whole and peeled + 1 clove minced
1 teaspoon chili oil
3-3.5 cups water
1 cube vegetable bullion (I’ve used chicken or beef cubes)
2/3 cup red lentils
1/2 cup pearl barley (or just plain barley)
salt and pepper
few pieces of raw chicken (optional)
In a pot, heat up some olive oil and sautee the onions and whole garlic clove for a few min. Add in the minced garlic once the onions are about to brown. Meanwhile, rinse & drain the barley and red lentils with water, making sure to remove any dirt or rocks.
Once the onions have browned, add in the 3 cups of water carefully (if you’re using regular barley, use 4 cups+). Add in the boullion cube (you can use fresh stock if you wish instead) and chili oil. Stir in the barley and lentils and cook for 40-60 min, depending upon which barley you’re using. Add more water if the soup gets too thick.
At this point you can add in the chicken pieces if you wish. Once the barley is tender, remove chicken pieces and shred into the soup. Adjust salt and pepper & serve immediately.
The difference between barley and pearl barley, is that the pearls have the polished to remove the outer husk so it can cook quicker but doesnt have as many nutrients as plain barley. The original recipe called for pearl barley which I didn’t have and so it took me an hour to properly cook the barley.
I wanted to give the chocolate-cherry cookie mixture another try so I tried a different recipe which I liked so much better. The oatmeal did wonders for it and gave a kick of nutrients.
Chocolate-Chip Oatmeal Cookies with Dried Cherries (from Bon Appetit Sept 2009)
1/2 cup (1 stick1) unsalted butter, room temperature + 1/2 cup unsweetened applesauce
1 cup (packed) golden brown sugar
1/2 cup sugar
1 teaspoon vanilla extract
2 large eggs
2 cups old-fashioned oats
1 1/2 cups all purpose flour
1 teaspoon baking soda
1 teaspoon salt
1 1/4 cups dried tart cherries (6 ounces)
1 1/4 cups semisweet chocolate chips (I did half semi and half bittersweet)
Preheat oven to 375 F. In a large bowl, whip together the butter, apple sauce, sugars, and vanilla extract. Blend in the eggs. Fold in the oats, flour, salt and baking soda until properly mixed. Stir in the cherries and chocolate chips.
Line a baking sheet with parchment paper. Spoon batter with rounded tablespoon 2 inches apart. Bake for 7 min, rotate pan and bake for 7 more min, 14 min total. Cool the cookies on a cooling rack and repeat with the remaining batter.
Braids Aren’t Just for Hair!
How many of us comb through our fridges every now and then end up throwing out sooo much food? Guilt floods and false promises are made that this will never happen again! It’s like throwing lighter liquid on your cash and lighting it with a match. It’s hard to control the food ins and outs when you don’t have sole control of cooking and grocery shopping. Although I try to control the things I make/buy, sometimes things get pushed back to the dark edges of the fridge.
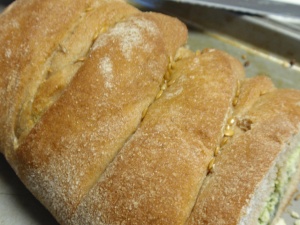
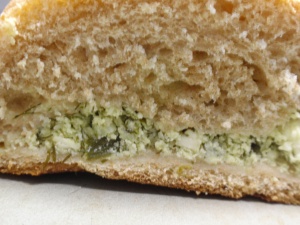
I had some feta cheese sitting in those dark edges and I decided to bring it to the light and make something out of it. Most common use is for salads, but I feel upon a recipe for Feta Dill Bread which is a braided bread. Never braided a bread but ones gotta try.
Feta Dill Bread Braid (from here)
Bread:
1 1/2 cups warm (100-110 degrees F.) water
2 teaspoons active dry yeast
2 1/4 cups whole wheat flour
2 cups unbleached white flour
3 tablespoons brown sugar
1 teaspoon salt
2 tablespoons olive oil
Filling:
1 cup crumbled feta cheese
1/3 cup ricotta or cottage cheese
1/2 cup chopped fresh dill weed
2 tablespoon melted butter
3 garlic cloves, peeled and finely minced
1 egg
In a large bowl combine the water and yeast and let is rest for 2 mins until the yeast has dissolved. Mix in sugar, oil, salt and 2 cups all-purpose flour. Beat with a hand/electric mixer until smooth. If you’re using a electric mixer, switch to a hook, otherwise you can use your hands when you add in the whole wheat flour. Kneed until a smooth elastic ball forms. Lightly oil the bowl and let it sit in a warm area covered for about 30 min or till the dough has doubled in size.
Meanwhile, combine the feta cheese, ricotta (cottage) cheese, egg, dill, butter, and garlic in another bowl. Mix till smooth.
Preheat oven to 380F. Punch down the dough and cut in half. Roll out the 1st ball of dough on a floured surface so it is 10′ by 12′ rectangles. With the narrow (long side) facing you, place half of the filling in a narrow vertical strip down the center of the dough. With a knife, cut the right and left sides of the filling’s dough intro strips.

Now starting from the top, alternately cross the right and left fringes over each other until the bread has been fully braided. Carefully place the bread on an oiled baking sheet and let it sit in a warm area covered for about 30 min. Repeat process on second ball of bread.
Place the bread in the oven for about 30 min or when the bread has browned nicely. Let it cool down just a bit before slicing and serving.
I attempted making Aebleskivers which are Danish pancakes that are filled with jam, and look more like puffs. I didn’t have the pan you’re suppose to use so I tried improvising with a mini muffin pan on top of a flat skillet.

Let’s just say its easier to make normal pancakes and spreading jam on top, which I ended up doing on the last half of the batter.
